⚡️FlashChat : Jetpack Compose + Firebase
Content
- Demo
- Setting up project
- Integrating Firebase
- UI Implementation
- Authentication
- Send Message
- Receive Messages
- Links which can be helpful
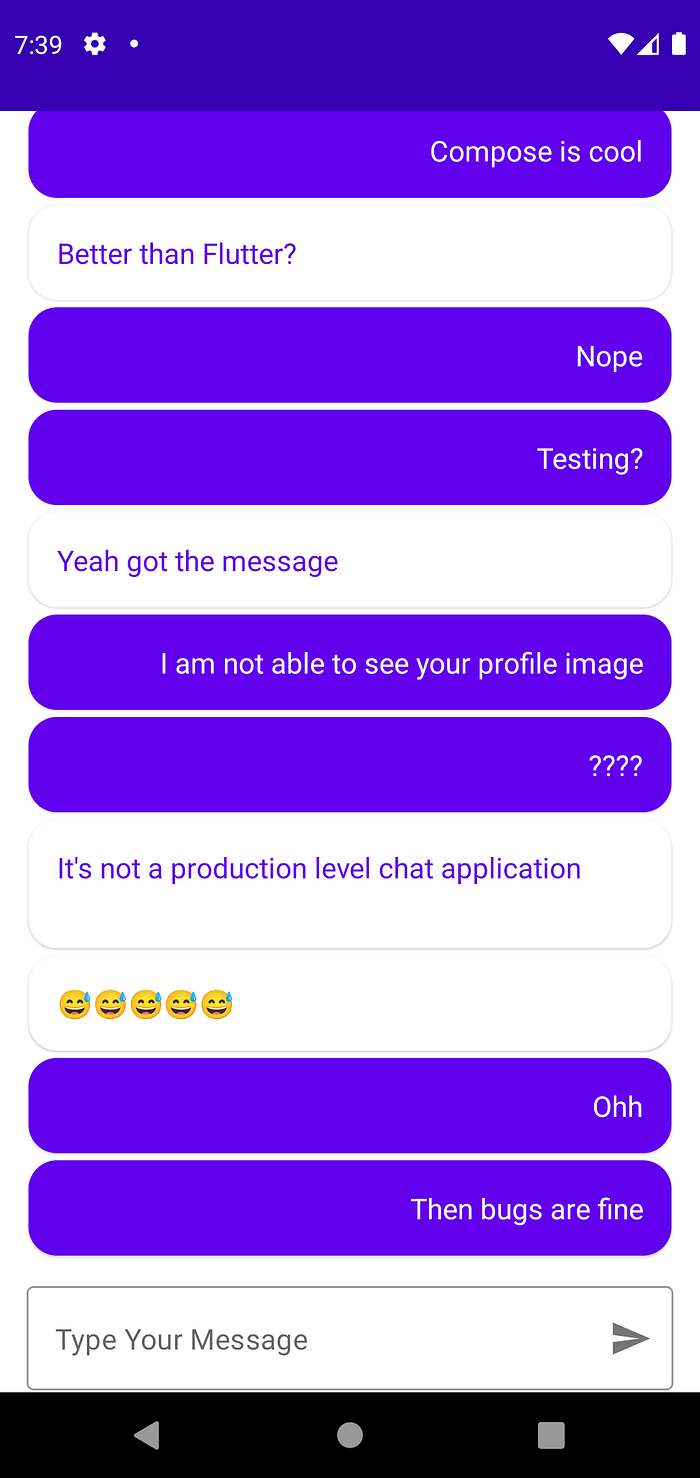
1. Demo
This is what I will be make by the end of this article.
2. Setting up project
For Jetpack Compose now you can use the latest Android Studio IDE. Few screenshots I have added for reference.


Now, as I move forward there are few dependencies I will need. I have added all the ones which I am using for this project below. More I will be adding in the further steps.
- implementation ‘androidx.lifecycle:lifecycle-livedata-ktx:2.3.1’
- implementation ‘androidx.lifecycle:lifecycle-viewmodel-ktx:2.3.1’
- implementation “androidx.compose.runtime:runtime-livedata:$compose_version”
- implementation ‘androidx.lifecycle:lifecycle-viewmodel-compose:1.0.0-alpha07’
- implementation “androidx.navigation:navigation-compose:2.4.0-alpha06”
I will be using ViewModel to manage the state of the application. There are other options also which you can check here.
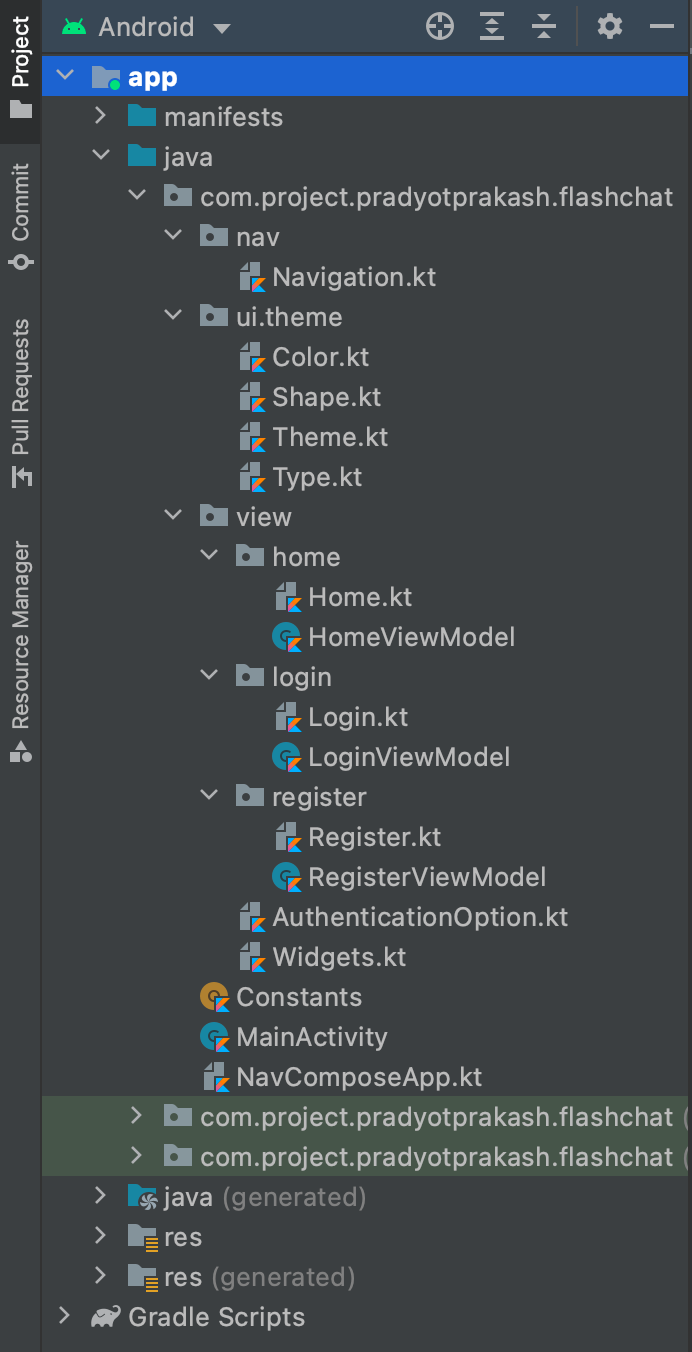
The folder architecture is taken from here. But have added ViewModel for the respective screen in the same directory.
3. Integrating Firebase
Let’s add Firebase for the application. I will be using only Authentication and Firestore modules.
The Firebase setup is similar to any other Android project. I have added these dependencies in app/build.gradle
- implementation platform(‘com.google.firebase:firebase-bom:28.3.0’)
- implementation ‘com.google.firebase:firebase-analytics-ktx’
- implementation ‘com.google.firebase:firebase-auth-ktx’
- implementation ‘com.google.firebase:firebase-firestore-ktx’
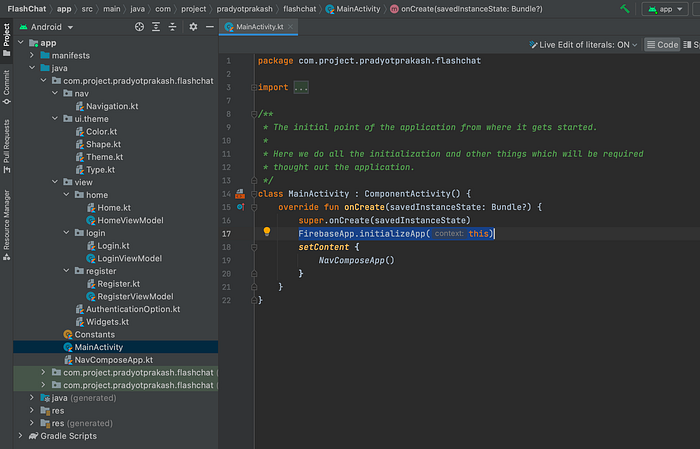
And in the MainActivity class, added FirebaseApp.initializeApp(this). This will initialze Firebase for our application with default options. And this is mandatory before you start using any Firebase modules.
4. UI Implementation
Now let’s make our AuthenticationOption screen,
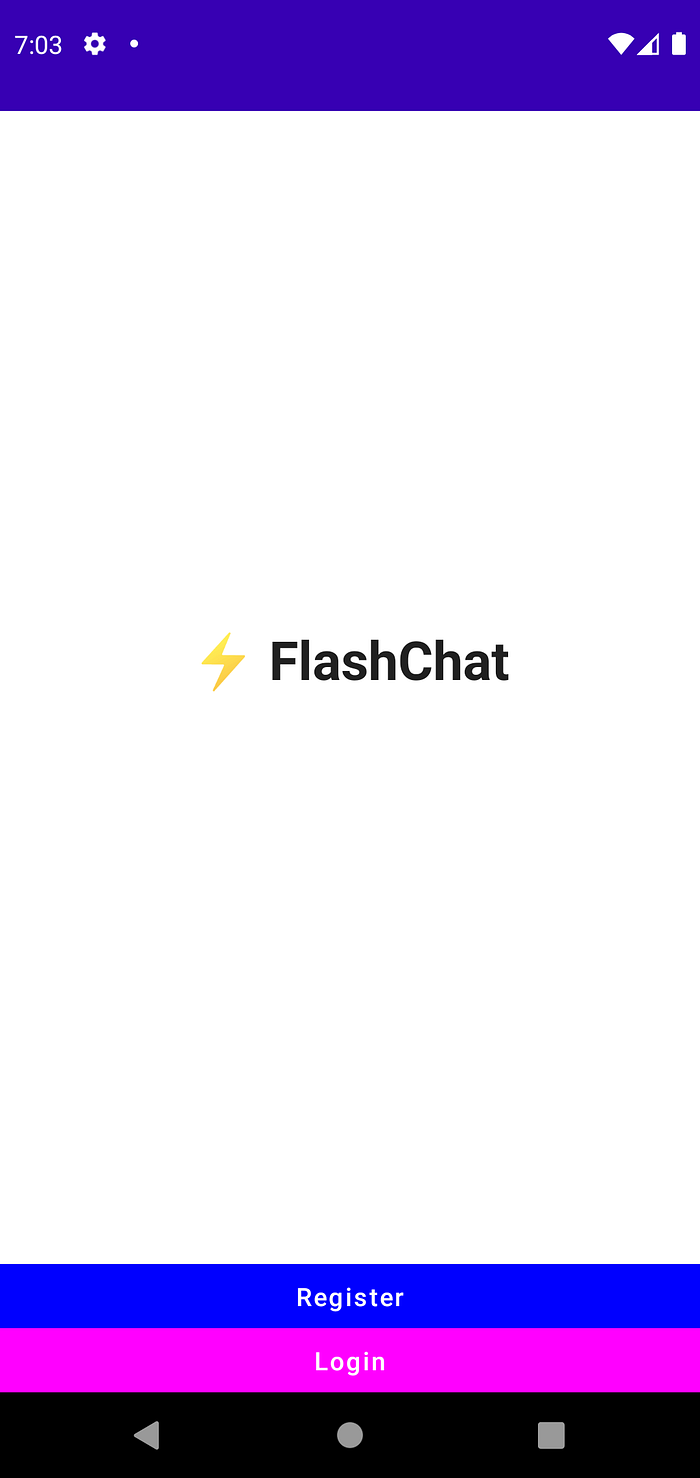
Check here for the code required to achieve this UI.
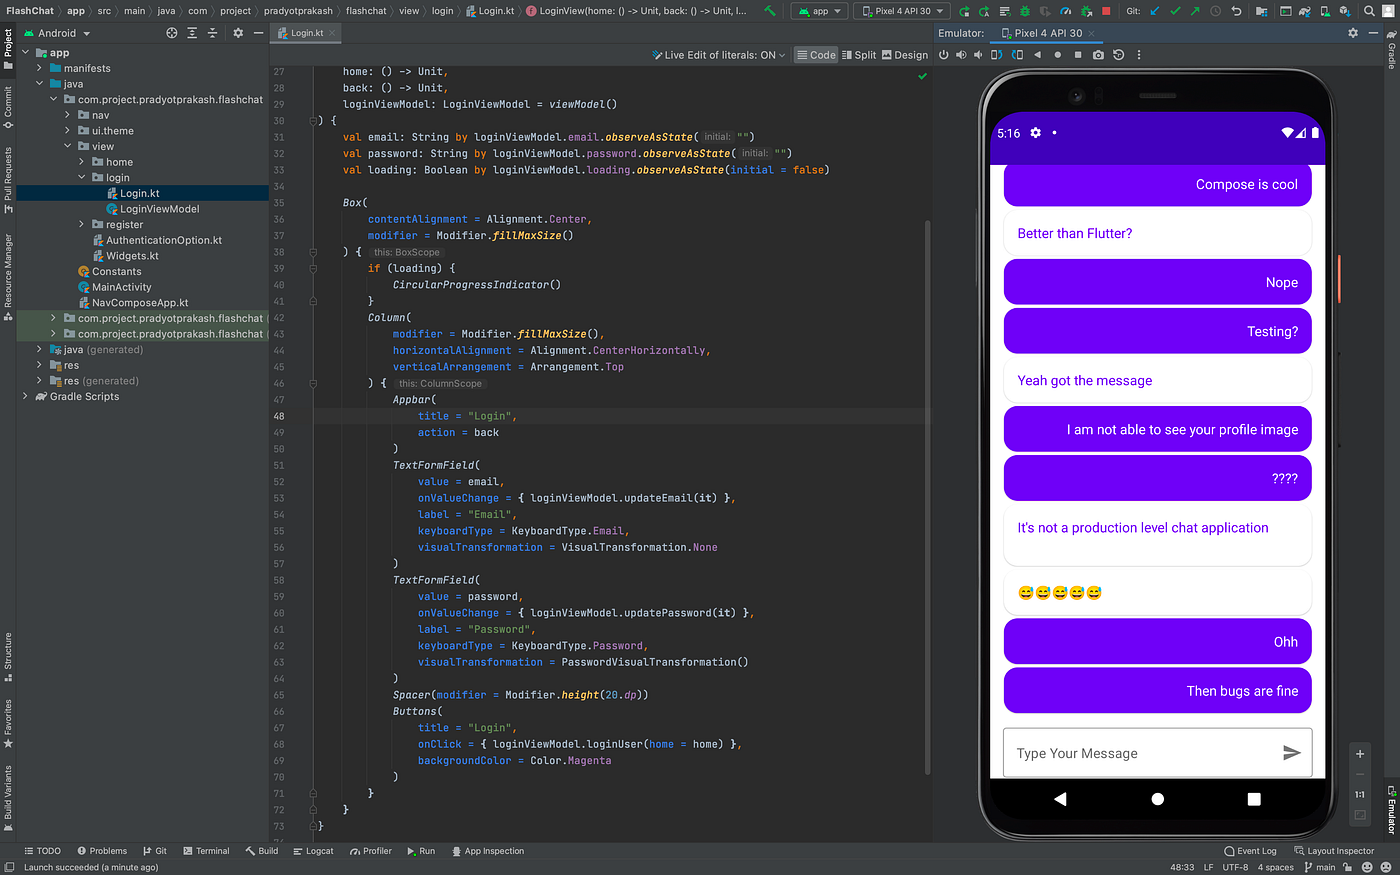
Now, the Register and Login screen are similar,


A Box is needed here to show a CircularProgressIndicator on top of the other views.
Check here for login screen and here for register.
I will check the home screen after integrating Firebase authentication module.
5. Adding Authentication
Adding authentication is very easy using Firebase. I will be using the Email and Password type in this project.
For register, when the user clicks on Register button after entering the email id and password, I call the createUserWithEmailAndPassword method of the FirebaseAuth which creates the user account and redirect it to the home screen. See the screenshot below for better understanding.
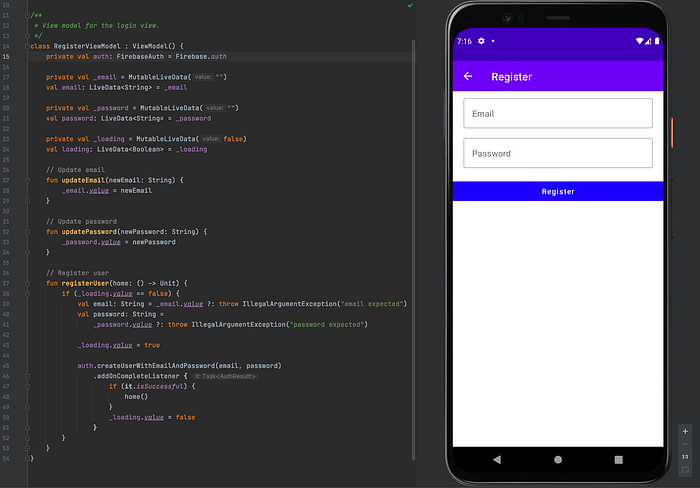
I am using MutableLiveData to update the state of the application. Like _loading is used to show the progress dialog when the user clicks on the Register button.
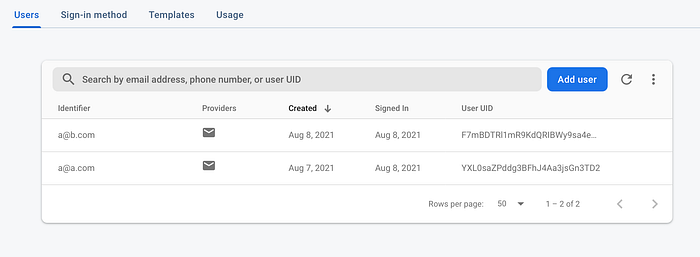
After registering in Firebase Authentication you can check the list of users,
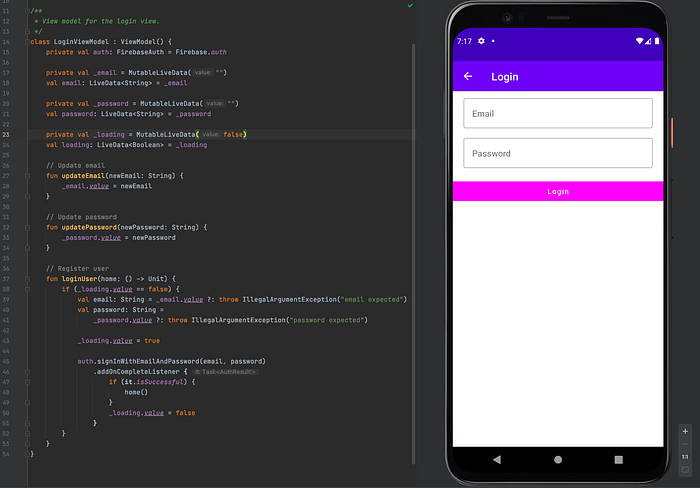
Similarly for the Login screen,
For login, when the user clicks on Login button after entering the email id and password, I call the signInWithEmailAndPassword method of the FirebaseAuth which authenticates the user and redirect it to the home screen. See the screenshot below for better understanding.
Check here for login and here for register code.
6. Send Message
Now, when the user is authenticated it’s time to allow them to send a message. For this Firestore is the best option.
In HomeViewModel, we will need the message which was typed by the user.
So before updating the value in Firestore we will check if the message is empty or not. And with the message we will also be adding “sent_by” and “sent_on” keys for checking from whom the message was sent and on when. Check below image for better understanding.
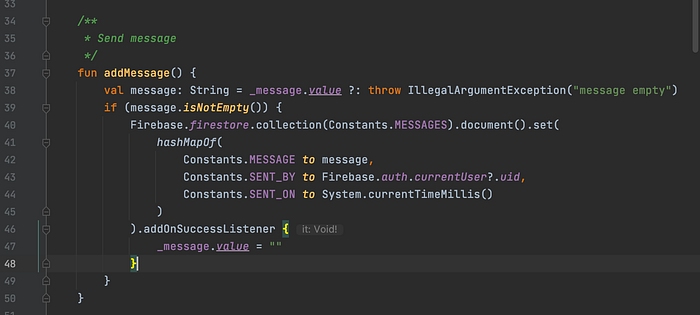
After successful message send in Firestore you can check a new document will be created for the given data.

Check here for the code related to send the message to Firestore.
7. Receive Messages
Now, if we are sending the message we should also show it. So we will be using the realtime option provided by Firestore package which will fetch the data whenever there is a change in the database.
For this only few lines of code is needed. We will be saving the list of messages into a class variable _messages which will update the ui whenever a new message is recieved.
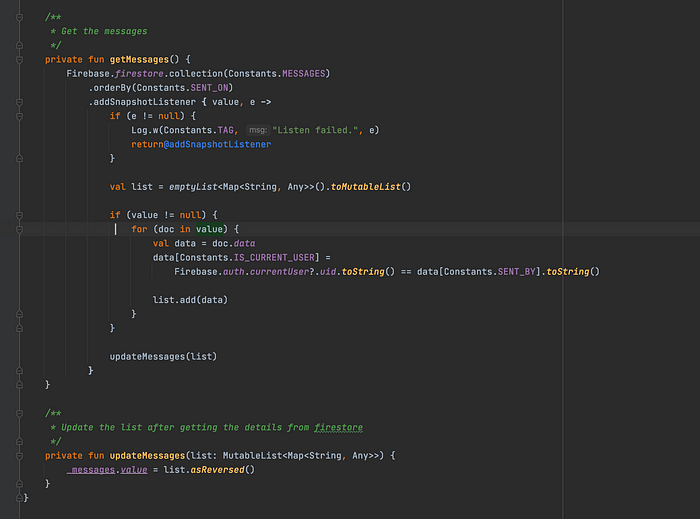
Check here for the code related to getting the message from Firestore in real time.
Now we have all the code which will be needed to send and receive the messages. Let’s complete the UI for the home page.
Here we will be using LazyColumn to update the messages list and an OutlinedTextField to allow the user to type and send the message.
Here two things we need to keep in check that, both the messages list and the LazyColumn are reversed so that it would look like a chat application. Means the latest message should be at the end.
To sort the messages based on the time we are using the “sent_on” key. And to check if the message was sent by the current user or not we are using the “send_by” key.
For single message the UI screenshot is added below,
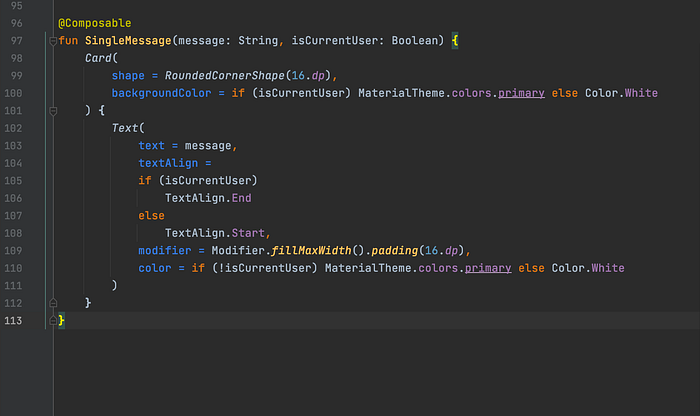
Can check the home screen UI here and also the single message UI here.
After all this the final output will be,
8. Links which can be helpful
- Project GitHub Link: https://github.com/pradyotprksh/development_learning/tree/main/android/FlashChat
- For example on Navigation in Compose: https://github.com/franciscobarrios/NavCompose
- Jetpack Compose documentation: https://developer.android.com/jetpack/compose/documentation
- Firestore integration example: https://github.com/raipankaj/Bookish
I have tried to make a small demo application which can be used as a starting project for Jetpack Compose.
As I keep on learning will write as many article I can and help you to understand the topic in more depth.
I have also wrote an article on Jetpack Compose vs SwiftUI !vs Flutter, which might help you understand the advantages of Jetpack Compose before you start. Can check the below tweet related to this.
I have also created a WhatsApp clone using Jetpack Compose. Can check the article from below,
Follow me and don’t miss any update on Medium. Also can follow me on Twitter where I share my thoughts and different article to various other technologies which I like or working on.